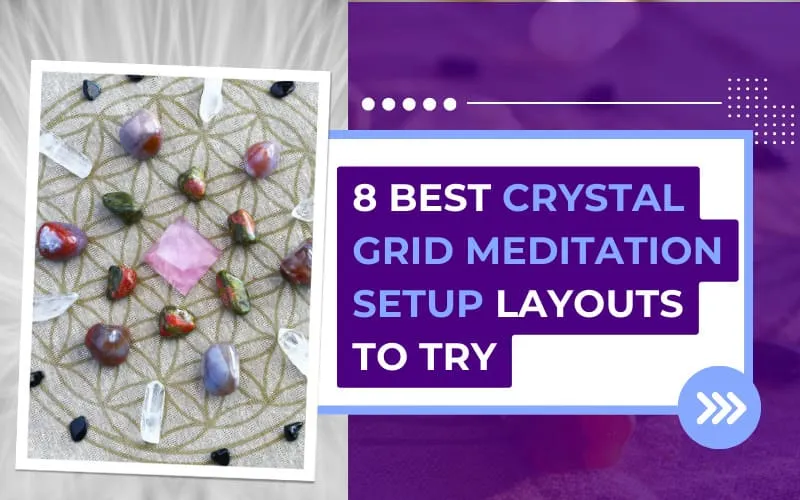
8 Best Crystal Grid Meditation Setup Layouts to Try
Quick Overview
This comprehensive guide explores crystal grid meditation practices and the eight traditional geometric layouts commonly used in spiritual communities. You’ll learn:
- How sacred geometry patterns are believed to work with crystal placement for meditation
- Eight specific grid formations (Chakra Alignment, Flower of Life, Merkaba Star, Celtic Cross, Infinity Symbol, Mandala Circle, Tree of Life, and Full Moon Crescent)
- Step-by-step setup instructions, crystal recommendations, and activation techniques for each layout
- How practitioners apply different grids for specific chakra work and meditation goals
Important: This article presents spiritual beliefs and traditional practices, not medical or psychological advice. If you experience persistent communication difficulties, voice problems, chronic throat or thyroid issues, please consult qualified healthcare professionals. These techniques are not substitutes for professional medical or therapeutic care.
Introduction to Crystal Grid Meditation Setup Benefits
Crystal grids represent sophisticated energy systems that work together with meditation practice according to spiritual traditions. When crystals are placed in geometric patterns, practitioners believe they create a unified field that amplifies each stone’s individual properties.
Crystal grids draw from geometric principles found in ancient architecture and spiritual practices across cultures. Major institutions including the Smithsonian Institution document how various civilizations have incorporated crystals and minerals into religious and ceremonial contexts throughout history, from Egyptian burial practices to Hindu temple rituals.
How Sacred Geometry Amplifies Meditation Energy
Sacred geometry forms the foundation of crystal grid meditation setups. These mathematical patterns appear throughout nature and have been incorporated into religious architecture across cultures, from ancient Egyptian temples to medieval European cathedrals, as documented in the historical study of sacred geometry. In spiritual traditions, these patterns are believed to create resonant frequencies that align with universal energy flow. The Flower of Life, Metatron’s Cube, and golden ratio spirals serve as blueprints for how energy is understood to circulate.
Each geometric pattern is thought to generate specific vibrational frequencies. Triangles are believed to push energy upward, circles to contain and amplify it, while spirals create continuous motion. Crystals act as conductors inside these patterns, channeling energy according to the grid’s design. This creates meditation enhancement effects that many practitioners find more powerful than using individual stones alone.
Why Crystal Grids Enhance Chakra Balancing
Traditional meditation often focuses on individual energy centers sequentially. Crystal grid practitioners describe geometric stone arrangements as creating interconnected energy networks believed to work with multiple chakras simultaneously. The geometric connections between stones are thought to mirror energetic pathways in the subtle body, creating harmony between physical and spiritual dimensions.
Resources like Crystal Vaults document various practitioner reports of enhanced meditation depth when using grid formations. Many users describe feeling more balanced energy flow and improved focus compared to working with individual stones. These grids are believed to create sustained energy fields that continue influencing the meditation space between active sessions.
Combining Ancient Wisdom with Modern Practice
Modern crystal therapy builds on thousands of years of indigenous wisdom. Archaeological evidence shows that crystals and carved stones held significance in ancient Mesoamerican and other cultures, though the specific purposes and meanings continue to be studied by researchers. Many ancient civilizations incorporated specific stone placement patterns into spiritual experiences and consciousness practices. Today’s practitioners combine this knowledge with contemporary understanding of energy medicine and consciousness exploration.
Crystal grid meditation setups bridge ancient spiritual traditions with modern interpretive frameworks. Rather than simply arranging stones, practitioners create intentional energy systems that interact with personal bioelectric fields according to spiritual beliefs.
Essential Materials for Your Crystal Grid Meditation Setup
Success with crystal grids depends on proper preparation and quality materials. Beyond crystals themselves, the right environment, tools, and techniques help ensure your grid formation achieves its intended purpose.
Choosing the Right Sacred Space
Your meditation space should be energetically clean and geometrically appropriate. Choose a location where you won’t be interrupted for extended periods. Energy flow is believed to move more freely in spaces with minimal electromagnetic interference, so consider avoiding areas near electronics or power lines.
Space requirements include:
- Minimum 6×6 feet for most grid layouts
- Level, stable surface for precise crystal placement
- Natural lighting when possible, especially during activation
- Good ventilation to maintain fresh energy circulation
- Privacy for uninterrupted meditation sessions
Crystal Selection and Quality Guidelines
Not all crystals work equally well in grids according to practitioners. Stones with strong, clear energy signatures and complementary vibrational frequencies are preferred. Crystal effectiveness depends on both individual stone quality and how well different crystals work together.
High-quality crystals exhibit:
- Clear, vibrant colors without cloudiness
- No chips, cracks, or structural damage
- Strong energetic presence when held
- Appropriate size for your grid scale
- Authentic mineral composition
Essential crystals for beginners:
- Clear Quartz: Master healer and amplifier
- Amethyst: Spiritual connection and intuition
- Rose Quartz: Heart chakra and emotional support
- Black Tourmaline: Grounding and protection
- Citrine: Manifestation and solar plexus energy
Grid Templates and Layout Tools
Precision matters in geometric patterns. Even small alignment errors can disrupt energy flow and reduce effectiveness according to traditional practice. Professional templates ensure accurate placement while reducing setup time.
Recommended tools:
- Sacred geometry templates (cloth or paper)
- Measuring ruler or compass
- Activation wand (selenite or clear quartz)
- Grid journal for tracking results
- Soft cloth for crystal protection
Cleansing and Preparation Methods
Crystal cleansing removes accumulated energies that could interfere with your grid’s purpose. Every stone should be energetically neutral before placement. This preparation phase is considered crucial – contaminated crystals can derail your meditation goals.
Effective cleansing methods:
- Moonlight exposure: 4-6 hours under full moon
- Sage smudging: Pass each stone through sacred smoke
- Sound clearing: Use singing bowls or tuning forks
- Saltwater bath: Brief immersion in sea salt solution
- Earth burial: 24 hours in natural soil
The 8 Powerful Grid Layouts for Meditation Practice
Each layout serves different purposes and energy requirements. Master these fundamental patterns before experimenting with complex variations. Your crystal grid meditation success depends on understanding how each formation channels energy according to traditional beliefs.
Layout 1: The Chakra Alignment Grid
This foundational pattern directly corresponds to the seven primary energy centers, creating energetic balance. The linear arrangement follows the body’s natural energy flow from root to crown chakra.
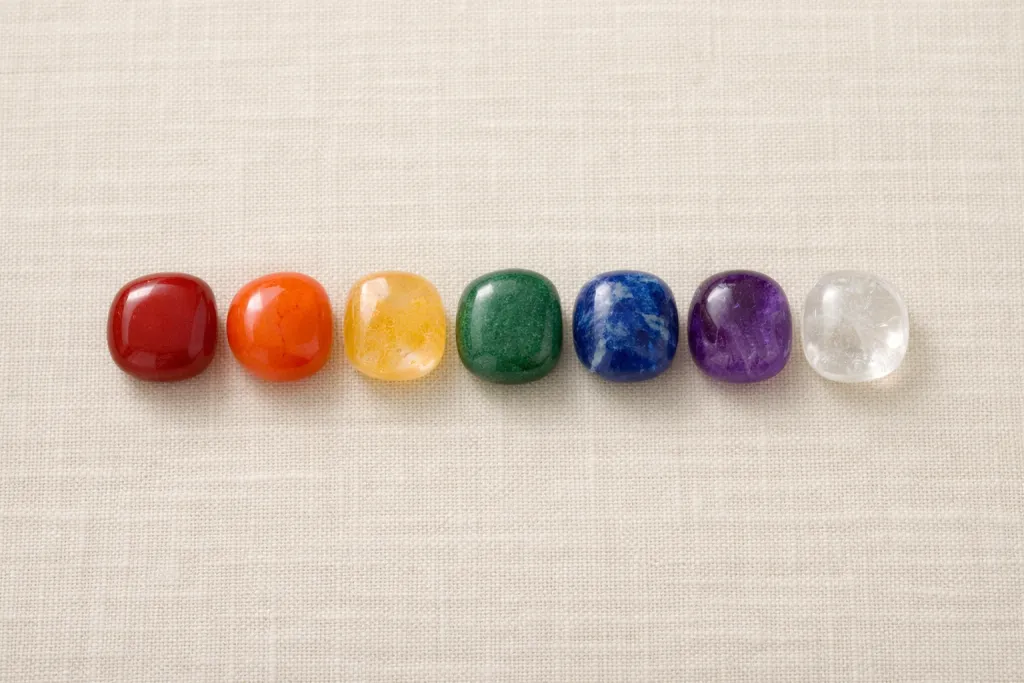
Crystal Placement Pattern
Arrange seven crystals in a straight line, spacing them equally about 6 inches apart. Place the root chakra stone (typically red jasper or hematite) at the bottom, progressing upward through orange carnelian, yellow citrine, green aventurine, blue sodalite, indigo lapis lazuli, and ending with violet amethyst at the crown position.
Position yourself so your spine aligns with the crystal row. Your physical chakra alignment should mirror the stone placement. This creates direct energetic connection between each crystal and its corresponding body center.
Recommended Stones for Each Energy Centre
Traditional correspondences described in crystal meditation communities:
| Chakra | Primary Stone | Alternative Options |
|---|---|---|
| Root | Red Jasper | Hematite, Black Tourmaline |
| Sacral | Carnelian | Orange Calcite, Sunstone |
| Solar Plexus | Citrine | Yellow Jasper, Tiger’s Eye |
| Heart | Green Aventurine | Rose Quartz, Malachite |
| Throat | Blue Sodalite | Aquamarine, Blue Lace Agate |
| Third Eye | Lapis Lazuli | Amethyst, Fluorite |
| Crown | Clear Quartz | Selenite, Diamond |
Activation and Meditation Technique
Begin grid activation by touching each stone with your dominant hand, starting from the crown and moving downward. Visualize white light entering through your crown chakra and flowing down through each energy center. Spend 30 seconds at each crystal, allowing its specific frequency to resonate with your corresponding chakra.
Your meditation techniques should focus on breath awareness and energy sensing. Breathe deeply into your lower abdomen, then slowly move your attention up through each chakra as you exhale. Feel the crystals supporting and amplifying each energy center’s natural vibration.
Optimal Session Duration
Beginners: Start with 15-20 minute sessions to avoid overwhelming your energy system. Intermediate practitioners can extend to 30-45 minutes. Advanced users may meditate for 60-90 minutes, though longer isn’t necessarily better. Listen to your body’s signals and end sessions before fatigue sets in.
Layout 2: Flower of Life Energy Grid
This sacred geometric pattern creates powerful energy amplification through its interconnected circle design. The Flower of Life appears in ancient temples worldwide, indicating its universal significance in spiritual practice.
Sacred Geometry Foundation
The Flower of Life consists of 19 overlapping circles arranged in a hexagonal pattern. This configuration generates multiple smaller geometric shapes – triangles, hexagons, and vesica piscis – each contributing unique energetic properties to your crystal grid meditation setup.
Each intersection point becomes a power node where crystal placement creates maximum impact. The pattern’s mathematical precision ensures balanced energy distribution throughout the entire formation.
Crystal Positioning Guide
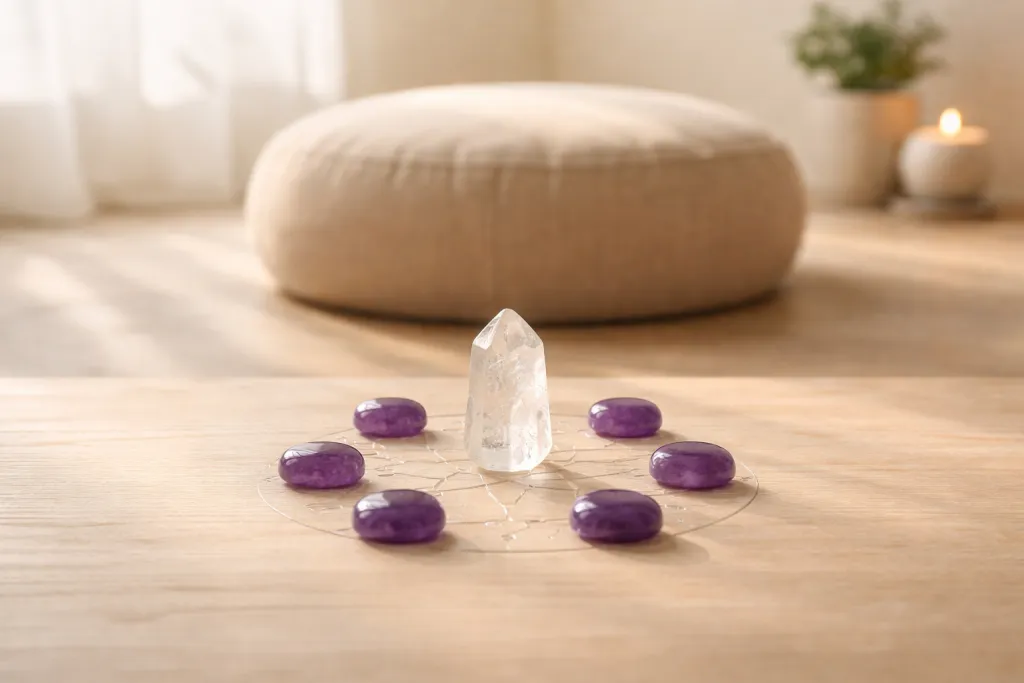
Place your master crystal (usually large clear quartz) at the center circle. Surround it with six supporting stones in the inner ring, spacing them equally around the perimeter. Add twelve additional crystals in the outer ring, creating three concentric circles of power.
Crystal selection for each ring:
- Center: Clear Quartz master (2-3 inches)
- Inner ring: Six matching stones (amethyst or rose quartz)
- Outer ring: Twelve smaller supporting crystals
Breathing Techniques for Maximum Impact
Coordinate your breath with the grid’s circular energy flow. Inhale while visualizing energy moving clockwise from the center outward. Exhale as you imagine the energy returning to the central master crystal. This creates continuous circulation that builds momentum with each breath cycle.
Practice the 4-7-8 breathing pattern: Inhale for 4 counts, hold for 7, exhale for 8. This rhythm is believed to synchronize with the grid’s natural frequency, creating deeper meditation enhancement effects.
Layout 3: Merkaba Star Crystal Formation
The Merkaba represents the light body’s geometric structure – two interlocking tetrahedrons creating a three-dimensional star. This advanced grid formation facilitates profound spiritual experiences and consciousness expansion according to practitioners.
Three-Dimensional Energy Structure
Unlike flat grids, the Merkaba requires stone placement at multiple elevations. You’ll create two triangular pyramids, one pointing upward (masculine energy) and one downward (feminine energy). Their intersection generates a powerful energy vortex perfect for deep spiritual practice.
The upward pyramid is believed to channel celestial energies while the downward pyramid grounds terrestrial forces. This dual-flow system creates balance between energy work and practical manifestation.
Master Crystal Selection
Your master crystal must be exceptionally powerful to anchor this complex formation. Select a double-terminated clear quartz point at least 3 inches long. This crystal sits at the exact center where both pyramids intersect, acting as the primary energy conductor.
Recommended combinations:
- Clear Quartz with Amethyst points
- Selenite with Rose Quartz
- Smoky Quartz with Citrine
Visualization Methods During Meditation
Begin by visualizing the geometric patterns spinning around you. See the upward pyramid rotating clockwise while the downward pyramid spins counterclockwise. This creates a protective energy field that accelerates your meditation state.
Focus on your body’s light centers expanding with each breath. Feel yourself becoming less dense, more luminous. Advanced practitioners report out-of-body experiences and profound spiritual insights during Merkaba meditations.
Layout 4: Celtic Cross Meditation Grid
This ancient symbol combines Christian and pagan traditions, creating a balanced energy amplification pattern. The Celtic Cross grid offers protection, grounding, and spiritual connection through its four-directional design.
Traditional Symbol in Crystal Work
The Celtic Cross represents the meeting point between earth and sky, matter and spirit. Its four arms extend in cardinal directions while the central circle unifies all elements. This makes it valued by practitioners seeking both grounding and spiritual elevation.
Historical use of this symbol in Celtic spirituality provides powerful archetypal energy. When you create this pattern with crystals, you tap into centuries of focused intention and sacred geometry work.
Four-Directional Energy Flow
Each arm corresponds to different elemental energies:
- North (Earth): Grounding stones like hematite or black tourmaline
- East (Air): Mental clarity crystals such as fluorite or sodalite
- South (Fire): Action stones including carnelian or red jasper
- West (Water): Emotional support crystals like moonstone or aquamarine
The central circle requires a master crystal that harmonizes all four elements. Clear quartz works well, though some practitioners prefer moldavite for enhanced spiritual connection.
Layout 5: Infinity Symbol Energy Loop
The infinity symbol creates continuous energy circulation perfect for manifestation and balance work. This figure-eight pattern harmonizes opposing forces while maintaining constant motion and renewal.
Continuous Energy Circulation Pattern
Energy flows in a perpetual loop through the infinity symbol, never stagnating or becoming blocked. This constant circulation prevents energy accumulation in any single area, creating balance between giving and receiving, masculine and feminine, action and rest.
Your crystal configuration should reflect this flowing quality. Arrange stones so energy can move smoothly from one loop to the other without interruption.
Dual Crystal Pathways
Create two parallel paths using complementary crystal pairs. One loop might feature yang crystals (citrine, carnelian, clear quartz) while the other uses yin stones (moonstone, rose quartz, amethyst). This polarity generates dynamic tension that powers the entire grid.
The intersection point where loops cross requires special attention. Place your most powerful stone here – typically a large clear quartz point or moldavite.
Manifestation Meditation Approach
Focus on your desired outcome while visualizing energy flowing through both loops simultaneously. See your intention gathering power as it travels the complete circuit. With each revolution, your goal becomes more energized and likely to manifest.
Manifestation steps:
- Set clear intention before activating grid
- Visualize desired outcome in vivid detail
- Feel gratitude as if goal already achieved
- Release attachment to specific timing
- Trust the process and remain open to opportunities
Layout 6: Mandala Circle Grid Setup
Circular grid formations represent wholeness, unity, and completion. The mandala pattern creates 360-degree energy harmonization, making it ideal for balancing work and consciousness expansion.
Circular Sacred Geometry Principles
Circles have no beginning or end, representing eternal cycles and infinite potential. When you arrange crystals in circular patterns, you create enclosed energy fields that build intensity through continuous circulation.
Your stone placement should follow precise geometric principles. Divide the circle into equal segments – typically 8, 12, or 16 sections depending on your crystal quantity.
Center-to-Perimeter Crystal Arrangement
Begin with a powerful master crystal at the exact center. Clear quartz pyramids work exceptionally well, though some practitioners prefer spherical stones for gentler energy distribution.
Arrange supporting crystals in concentric rings moving outward. Each ring should contain stones of similar properties – balancing stones in one ring, protective stones in another, manifestation crystals in the outermost circle.
Layout 7: Tree of Life Spiritual Grid
Based on Kabbalistic wisdom, the Tree of Life grid connects ten energy centers representing different aspects of existence. This complex pattern facilitates deep spiritual practice and personal transformation.
Kabbalistic Energy Centers
Each of the ten Sephirot corresponds to specific divine attributes:
- Kether (Crown): Pure consciousness and unity
- Chokmah (Wisdom): Creative force and masculine energy
- Binah (Understanding): Receptive wisdom and feminine energy
- Chesed (Mercy): Loving kindness and expansion
- Geburah (Severity): Strength, discipline, and contraction
- Tiphereth (Beauty): Balance, harmony, and the heart center
- Netzach (Victory): Endurance and emotional expression
- Hod (Splendor): Intellectual analysis and communication
- Yesod (Foundation): Subconscious patterns and lunar energy
- Malkuth (Kingdom): Physical manifestation and earthly experience
Multi-Level Crystal Positioning
The Tree of Life requires three-dimensional stone placement across multiple elevations. Create the pattern on a large cloth or board, using different crystal sizes to represent each Sephira’s relative importance.
Begin at Malkuth (physical realm) and work upward through each level. Spend several minutes at each Sephira, contemplating its divine attribute and how it manifests in your life.
Layout 8: Full Moon Crescent Formation
This lunar-inspired grid harnesses moon energy for intuition enhancement and emotional balance. The crescent shape naturally channels receptive, feminine energies perfect for inner exploration and psychic development.
Lunar Energy Amplification
Moon phases are believed to influence human consciousness and emotional states. The crescent formation mimics the new moon’s energy – potential, possibility, and new beginnings. Your crystal grid meditation setup becomes a lunar energy collector that continues working between sessions.
Position the grid so the crescent opens toward the east, welcoming dawn energies and new opportunities.
Crescent Shape Crystal Arrangement
Create the crescent using 13 crystals representing the lunar year’s cycle. Begin at the bottom point and work upward along both curves, placing stones at equal intervals. The thirteenth crystal sits at the exact center of the crescent opening.
Recommended lunar crystals:
- Moonstone: Primary lunar connection and feminine energy
- Selenite: Mental clarity and crown chakra activation
- Labradorite: Psychic protection and mystical insights
- Clear Quartz: Energy amplification and spiritual connection
- Amethyst: Third eye activation and spiritual wisdom
Moon Phase Timing Considerations
Align your crescent grid sessions with actual lunar cycles for maximum effectiveness. New moon periods amplify intention-setting and manifestation work. Waxing moons support growth goals. Full moons enhance intuition and psychic abilities. Waning moons facilitate release and cleansing work.
Chakra-Specific Grid Applications
Different energy centers respond to specific geometric patterns and crystal combinations. Understanding these correspondences allows you to customize your crystal grid meditation setup for targeted energy work.
Root Chakra Grounding Layouts
Root chakra work requires strong earth connection and security-building energy. Create square or rectangular patterns using grounding stones like hematite, red jasper, or black tourmaline. These angular formations provide stability that root chakra imbalances benefit from.
Heart Chakra Balancing Configurations
Heart chakra work benefits from circular or heart-shaped patterns that promote emotional flow. Use green and pink crystals like rose quartz, aventurine, or malachite arranged in gentle curves that mirror the heart’s natural shape.
Third Eye Activation Patterns
Third eye development requires precise geometric patterns that stimulate psychic abilities and inner vision. Triangular formations work exceptionally well, with the apex pointing toward magnetic north to align with planetary energy fields.
Crown Chakra Connection Setups
Crown chakra activation requires the most refined crystal configurations and highest-vibration stones. Create mandala patterns using clear quartz, selenite, or moldavite arranged in perfect circles or spirals that mirror cosmic energy patterns.
Meditation Techniques for Each Grid Layout
Each grid formation requires specific meditation approaches to maximize its unique energy signature. Understanding these correspondences helps you extract maximum benefit from your setup.
Breathing Patterns and Rhythms
Geometric patterns are believed to generate specific vibrational frequencies that respond to coordinated breathing rhythms. Linear grids work best with simple in-out breathing cycles, while circular patterns benefit from cyclical breath awareness.
Pattern-specific breathing:
- Linear grids: 4-count inhale, 4-count exhale
- Circular formations: Continuous breath cycles without pauses
- Triangular patterns: 3-6-3 breathing (inhale-hold-exhale)
Body Positioning and Alignment
Your physical posture directly affects how crystal energies interact with your personal energy field. Each grid layout requires specific positioning for optimal energy reception through your chakra system.
Maintain spine alignment with the grid’s primary energy axis. Linear formations require straight-spine positioning, while circular grids benefit from centered, cross-legged postures.
Visualization and Intention Setting
Energy work effectiveness depends on focused visualization and clear intention setting. Each grid type responds to specific mental imagery that resonates with its geometric structure and energy flow pattern.
Effective visualization techniques:
- See energy flowing along crystal connections
- Visualize yourself surrounded by protective light
- Imagine desired outcomes manifesting through grid power
- Focus on chakra colors corresponding to grid purpose
Troubleshooting Your Crystal Grid Meditation Setup
Even experienced practitioners encounter challenges with their grid formations. Understanding common problems and solutions ensures consistent results from your crystal therapy practice.
Recognizing Effective Energy Flow
Successful grids produce noticeable energy sensations during meditation. You may feel warmth, tingling, or gentle pressure around your body as crystal energies activate. Mental clarity increases while emotional turbulence subsides during effective sessions.
Signs of proper grid function:
- Physical sensations of energy movement
- Enhanced mental focus and clarity
- Emotional balance and inner peace
- Vivid dreams or spiritual insights after sessions
- Gradual improvement in targeted life areas
Adjusting for Personal Sensitivity Levels
Crystal sensitivity varies dramatically between individuals. Some people feel overwhelmed by minimal stone placement while others require powerful formations to notice effects. Adjust your grids according to your personal response patterns.
Sensitivity adjustment strategies:
- Start with fewer crystals and gradually increase
- Use smaller stones for gentler energy
- Reduce session duration if effects feel overwhelming
- Add grounding stones if energy becomes too intense
Common Setup Mistakes to Avoid
Improper grid construction can neutralize or reverse intended effects. Crystal placement precision matters more than most beginners realize. Even small alignment errors can disrupt energy flow.
Critical mistakes to avoid:
- Using uncleansed or programmed crystals
- Mixing incompatible crystal energies randomly
- Ignoring geometric precision requirements
- Placing grids near electromagnetic interference
- Rushing through activation procedures
Grid Maintenance and Crystal Care
Proper maintenance ensures your crystal tools remain energetically clear and powerful. Neglected grids can become contaminated with stagnant energies that interfere with meditation goals.
Optimal Grid Duration Guidelines
Most grids should remain active for 3-7 days maximum before dismantling and cleansing. Manifestation grids can work for up to two weeks, while balancing formations typically require daily renewal.
Duration recommendations:
- Balancing grids: 24-48 hours maximum
- Manifestation patterns: 7-14 days
- Protection formations: Until threat passes
- Spiritual development: 3-5 days per session
Proper Dismantling Procedures
Deactivate grids systematically to prevent energy shock or crystal damage. Begin by thanking each stone for its service, then remove crystals in reverse order of placement. This approach maintains energetic harmony and prepares stones for cleansing.
Crystal Storage Between Sessions
Crystal programming and energetic clarity depend on proper storage conditions. Keep different stone types separated in natural materials like wood, cloth, or bamboo containers. Avoid plastic storage that can interfere with natural vibrations.
Storage best practices:
- Wrap each crystal in natural cloth
- Store in wooden or bamboo containers
- Keep different types separated
- Check periodically for chips or damage
Advanced Tips for Experienced Practitioners
Mastery of crystal grid meditation setup opens possibilities for sophisticated energy work and spiritual practice development. These advanced techniques require solid foundation in basic grid work.
Combining Multiple Grid Patterns
Advanced practitioners can layer different geometric patterns for complex energy effects. Combine a protective Celtic Cross with a manifestation Flower of Life, or overlay chakra alignment grids with lunar crescents for multifaceted results.
Seasonal Grid Adaptations
Align your grid formations with natural cycles for enhanced effectiveness. Spring grids emphasize growth, summer patterns focus on manifestation, autumn formations support harvest and gratitude, while winter grids encourage introspection.
Creating Personal Signature Layouts
Develop unique grid configurations that reflect your personal energy signature and spiritual goals. These custom patterns often prove more effective than traditional formations because they resonate perfectly with your individual vibration.
Experiment systematically with different crystal combinations and geometric structures. Document results meticulously to identify patterns that consistently produce desired effects.
Conclusion
Mastering crystal grid meditation setup transforms your spiritual practice from simple relaxation into powerful energy work that accelerates personal growth and manifestation abilities. These eight fundamental layouts provide the foundation for lifelong exploration of sacred geometry and crystal applications.
Remember that consistency matters more than complexity. Regular practice with simple grids produces better results than sporadic work with elaborate formations. Start with the Chakra Alignment Grid to establish your foundation, then gradually incorporate more complex patterns as your sensitivity develops.
Your crystal grid meditation setup becomes more powerful with experience and intention. Each session builds your understanding of energy flow, geometric patterns, and crystal programming. Trust your intuition, document your experiences, and remain open to the profound transformations these ancient practices can facilitate.
Begin today with whatever crystals you have available. Perfect grids matter less than sincere intention and consistent practice. Your crystal allies are waiting to support your spiritual journey.